Did you buy a vintage car made in the 80s, or the 90s perhaps, and started wondering if that is the worst sound system you have ever seen?
Welcome to the “we hate old car models’ audio engineering” club.
Well, we can’t help you change the system, not that we are suggesting doing that. But if the absence of an aux cord mainly fueled your frustration, and you would like to change the situation, you’re in the right place.
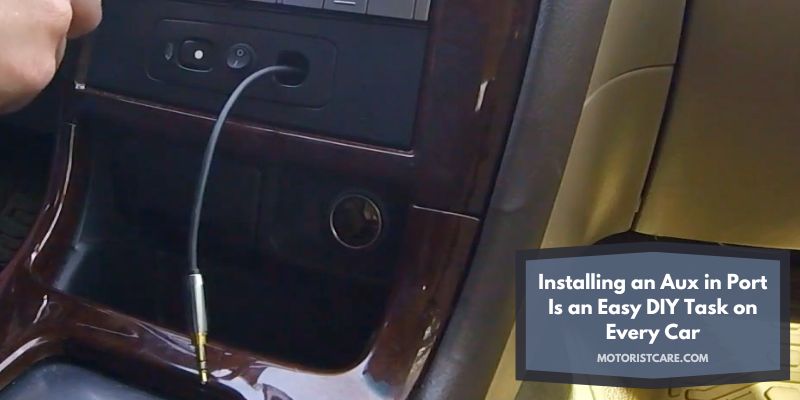
Installing an aux-in port is an easy DIY task on every car, so easy that an average Joe could do it without breaking a sweat.
Ways to Install An Aux-in Port
So, how many ways are there to install an AUX input, and is it that simple to do it?
Fortunately, there is more than one way to install it. Which method you will follow depends on the stereo system you’ve got.
And yes, the installation processes I have included are easily achievable. I will cover the three most popular methods in this installation guide – connecting 3.5 mm cable via the RCA, the CD changer, and the FM modulation.
The easiest of the bunch is to plug in an AUX adapter cable to the RCA port if your stereo has the said port. However, don’t lose your heart if your system doesn’t have a port. You can still install an aux input in other ways.
There are two more alternative methods when the first method is out of the equation.
One way is to directly connect the AUX cable to your CD changer port, and another is to override the FM modulator.
However, these methods may be more challenging than the previous one. But worry not, as I am here to explain the processes in such a manner that would make them more seamless and understandable to you.
Skills and Supplies Needed
Don’t get scared. You don’t need an electrical engineering degree to conduct the installation– you just need a basic understanding of electronics and soldering and also a will to follow instructions.
And as for supplies, you will need –
- An aux cable and a Y-Adapter cable (RCA to AUX) for the first method
- Screwdrivers, electrical tape, soldering iron, solder wire, and an auxiliary cable for the latter ones
The Preliminaries – Locating the RCA
First, you need to remove the stereo to check whether your system has the RCA, regardless of the method you follow.
To remove it, depending on the car model, you will have to detach the gear shifter first, then the air vents, and finally the stereo.
Now that you’ve removed it, start looking for the RCA.
So, have you found the RCA?
If you don’t know where to look, it should be at the back of the stereo marked L and R, usually colored red and white. If you found the RCA, scroll down and follow the steps I mentioned in the first method.
If you didn’t find the RCA already, it probably means your stereo doesn’t have it.
Hard luck! Skip to the second or the third one and follow the instructions. Good luck!
Also read:
- How To Remove Pioneer Car Stereo Without Keys
- How To Remove JVC Car Stereo with Keys And without Keys?
- How To Remove Alpine Head Unit with Keys and Without Keys
- How To Remove A Kenwood Car Stereo | Step by Step Guide
- How To Remove Sony Car Stereo with Keys & without Keys
First Method – The ‘Easy’ One – Y-Adapter
You’re to follow this method only if your stereo has the RCA.
This relatively easy method entails connecting the aux to the RCA port. If you’re reading thus far, I am guessing you’ve followed my instructions.
In that case, your stereo should already be removed, and you have located the RCA. So, let’s get to it.
Connect the Y-Adapter
Grab the Y-Adapter. Check whether you have bought the right one. It should have two ends – 2 RCA inputs at one end, one colored red and the other colored white, and a 3.5 mm input at the opposite end.
So, if your cable matches my description, you, indeed, have bought the correct one. Great!
Take the red RCA end, and plug it in the red port. Similarly, take the white one, and plug it in the white port.
Finally, the time has come for the part we all have been waiting for. Take the 3.5mm jack and plug it into your phone or the device from which you will receive the audio
Play an audio track or something. The car’s speakers should diffuse what I call the sound of vindication.
The next and final step is to put the stereo back in its original place. Before doing so, make sure you firmly plug in the RCAs.
So, there you have it, the installation of an AUX – yes, it’s that easy. You’re welcome, by the way.
Second Method – The ‘Not-So-Easy’ One – CD Changer
If you’ve scrolled down to this part, it means you’re one of those unlucky people whose stereos don’t have the RCA port. You can either follow this or the latter one.
This method involves connecting the aux cable directly to the CD changer port.
Note that you will need some soldering skills to install the aux input. I suggest you watch some instructional videos on maneuvering a wire solder on YouTube and come back.
I know the process will be challenging, but we will get through this together. Let’s start.
Unscrewing the Stereo
You must dismantle the stereo first and sever the motherboard from the case. Then look for the CD changer input, which should be easy to find for having a conspicuous 8 pins (Honda cars usually have 14 pins).
Soldering the AUX Into the CD Changer Port
This step starts with you trying to find the CD changer’s right, left, and ground inputs.
Afterward, cut one end of the 3.5 mm cable, and you should see three wires, a black ground wire, a red left-channel wire, and a white right-channel wire. Then solder the AUX cable’s wires to the inputs accordingly.
After successfully soldering, screw the stereo box and put it in its place. Remember to tape down the wires to the motherboard for sustainability before reassembling the stereo.
You may need to choose CD input on the stereo for it to work. Take the other end of the AUX, plug it into your device, and play an audio. I know it has been a tough road, hope it was worth the time and effort put in.
Third Method: Make Use of Your FM Modulator
We will override the FM signal by soldering the 3.5 mm cable to the FM modulator in this approach. You can choose this over the previous method if you want a mono sound and comparatively better bass and treble response.
For those who don’t know what mono audio is, to oversimplify the definition, it’s a single audio signal with the same output on both channels. In comparison, stereo provides two different signals in the left and right channels.
Unscrew the Stereo
You need to dismantle the stereo like before and, this time, look for the FM modulator.
After finding the modulator, look for its inputs. They should be on the opposite side of the board.
Soldering the AUX into the FM Modulator
Now that you have found the inputs, it’s time to connect your aux to these. You need to cut one end of the 3.5mm cable to expose its three wires, the same as before.
You have to solder the black ground wire to the ground input of the motherboard and either one channel to the primary input, usually labeled AF. Then tape down the cables to the board.
Now, like the previous method, reassemble the stereo, and put it back. Take the aux cable’s intact side, plug it into your phone or other devices, play audio, and hopefully, the sound will come out.
Again, just remember to choose FM on your stereo for it to work.
You’re Welcome
Instructional contents like this are for people who want to listen to audio streaming, podcasts, and audio-book in their automobiles but can’t, as an aux input is absent in most of these vintage four-wheelers.
I have tried to make the instructions clear and easier to comprehend. So, good thing that you found me.
Now you should become a pro at installing an aux-in port, as it is an easy DIY task on every car.