Every car manufacturer designs their cars differently. However, some components and the basics remain somewhat the same in similar models and price ranges.
Cars using Pioneer car stereos pretty much have the same installation; thus, the removal of the stereo is not quite a complicated process. So, here is how to remove Pioneer car stereo without keys explained step by step.
11 Steps To Remove Pioneer Car Stereo Without Keys
If you follow through with this article properly, then I’m sure you can remove the stereo system in under 7 minutes. So, without further ado, let’s start the process.
Step 1: Unplugging
In the very first step, you have to unplug the negative cable of the battery. You can do this by using either a screwdriver or a wrench. Either way, just make that you have loosened the grip over the negative lead.
Step 2: Remove The Face Plate from The Cradle
The second step requires you to remove the faceplate from the mounting cradle. You can remove this from either left or right side of the stereo. Usually, there is a button on one of the sides, with the help of which; you can remove the faceplate with ease.
There is also a plastic frame around the faceplate; if you see any, make sure to pull that out as well. Depending on the model of the vehicle, the position of the button or the way it’s attached to the vehicle can vary. So, keep a lookout for that and follow your instincts.
Step 3: Instrument Removal
Anything that is getting in your way and the mounting bracket—like any instrument or additional components—should be removed at this stage. The process of how you can access the stereo mount bracket might be different for every vehicle. So, please seek professional help if you struggle with this step.
Step 4: Unscrew
In this step, you have to unscrew each side of the stereo system. Unscrewing cannot be a complicated step, so not going to stretch this step any further.

Step 5: Removing the AC Vent
After you are done unscrewing the stereo system, to get more ease of access, remove the AC vents. Depending on what vehicle you have, the fourth and the fifth step might interchange in this series of actions. If you have a van, then you will have to get to the AC vents first and remove those bad boys.
And if it is not a van, then the step remains in this order. Removing the AC vents might be a bit tricky, but all you have to know, at which angle do the vents align with the screw openings.
Step 6: Pop The Window Switch
In between the vents, you will find a switch that you can remove with the help of a plastic trim stick. But now that the AC vents are removed, you can easily reach in and pop the switch using your fingers.
Please be careful about the wires attached to the switch. While removing, don’t force it out. Take it out gently.
Step 7: Remove The Switch Lock
There should be a lock on the switch that keeps the wires connected. Just try to pry the lock upwards with a screwdriver or virtually anything that you can find. Once you successfully push it upwards, a part of the wires should come loose. At that moment, grab the switch and push the secondary lock to take the whole thing out.
Step 8: Remove The Bolts
After removing the window switch, there you should find a bolt that is holding the system tight. Also, there is another bolt right above the radio, which you will find hidden under a rubber lining. Remove these two bolts using your cordless impact wrench or use any other measurements as you like. Just take those off.
Don’t forget to look carefully at what mm bolts have been used to match your Milwaukee.
Step 9: Remove The Panel
Covering the whole stereo, there is a plastic panel which needs to be removed. There are several hinges and screws holding the whole panel in its place, and it’s different for different vehicles.
So, I would suggest you remove the plastic panel according to your vehicle’s model and figure out where the screws and hinges are holding the cover in place.
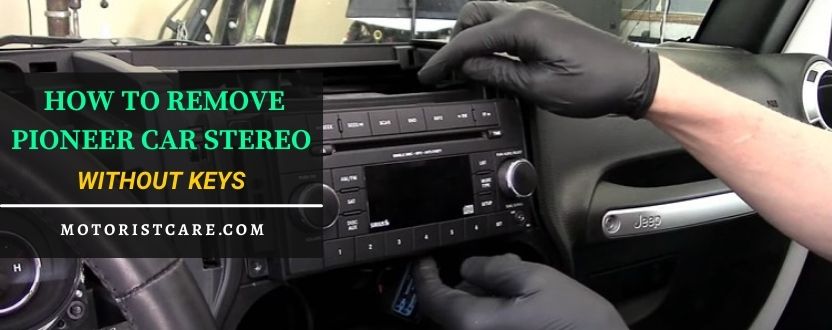
Step 10: Remove Pioneer Stereo
Finally, in this step, you are about to remove the stereo. After putting the plastic cover away, you shall see that the stereo is uncovered and exposed. Now, take a good look, and you will notice that there are four screws on the perimeter of the stereo.
After you remove the screws, carefully hold the stereo from both up and down and sandwich it in your hands and pull it slowly. Shimmy it up and down, side by side a little if it does not want to come off.

Step 11: Unscrew Again
There should be some connectors on the back of the stereo. Unlock the wire connector from the back and unplug the other two connectors that are used to give you wireless signals. And there you have it; your stereo is now removed successfully.
Final Words
In the steps mentioned above, I have explained how to remove Pioneer car stereo without keys. I hope the steps make sense to you. If It doesn’t, no worries, other professionals in this field are ready to help you out.
Related Posts You May Read:
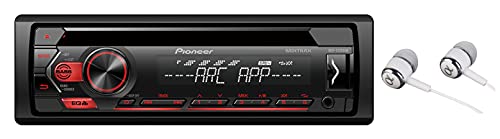
Featured Pioneer Car Stereos
This one easily takes the spot as the best overall car stereo with a backup camera you can buy thanks to its large display, great audio and cool connectivity features.
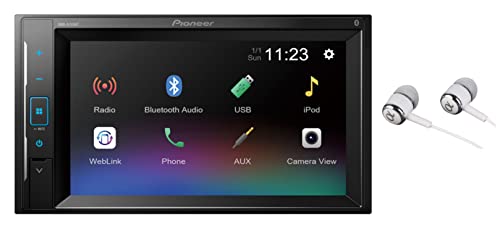
Compatible with both ios and android, it offers you the chance to hook it up with any smartphone. In addition to the smooth display, you’ll also get parking assist guidelines.

If you want a more futuristic experience with your stereo system, the voice control feature of Pioneer’s AVH-X490BS will impress.

Even if you don't carry any device with you, you can listen to your favorite songs on the go as it allows you to access any music app directly! So if you are into Pandora or Spotify, this is the stereo you need in your life.

Pioneer is known for making top-tier car stereo systems over the years. And this one is made with a CEA amp, and the power output is 200watts. Hence, you will get a super loud sound music experience without ruining the audio quality.