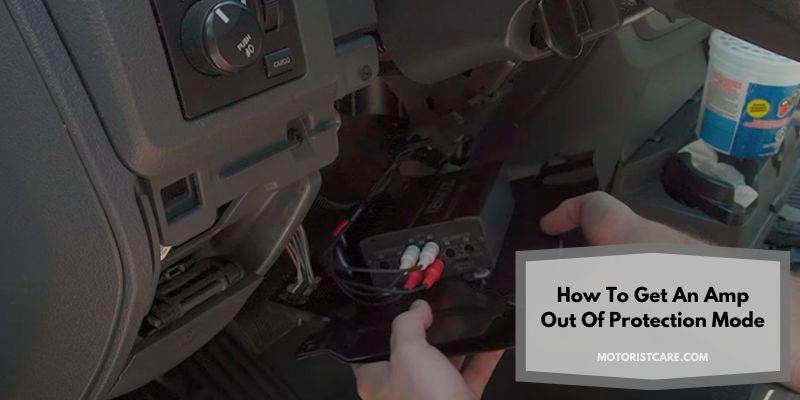
Modern cars are packed with bunches of safety features to prevent unexpected damages automatically. The amplifier protection mode is also the same. But sometimes it becomes annoying when your car speakers switch to the mode without prior warning. So, how to get an amp out of protection mode in this situation?
In general, when the issue occurs, there can be single or multiple reasons behind this. For example, a defective transistor, power load, overheating, and wrong impedance loads – any of these can initiate the problem.
The process to get your amp out of the protection mode is a bit complicated, yet it can be done. Firstly, you need to find the source component causing the problem. Upon finding the root cause, you can take the required steps.
In this post, I’ll explore the basics of the protect mode, why it stays activated, and lastly, how to get rid of this mess.
“Since it’s a complete technical discussion, make sure to go through all sections. Skipping any can lead you to the wrong approach with the fixing and cause severe damage to your system.”
How Does an Amp Protection Mode Work?
An amp protect mode is the latest safety feature in a contemporary vehicle sound system. This default setting turns off the power drive of the device upon detecting risky activities in the system.
“The protection mode doesn’t shut down your amplifier. Rather it stops the power flow by turning the system into somewhat sleeping mode.”
For example, if your car amp has this feature, it’ll shut down the unit if an overload or short circuit is detected.
The sole purpose of this setting is to avoid harming the unit itself and its integrated components.
How Do I Know If My Amp Is in Protective Mode?
There are no universal ways to determine if your amp is in protective mode. Depending on your amp generation, the identification system may vary.
For instance, in some amps, a blue LED light turns on, and the speaker blares when switching to the protection mode.
Most popular amps like Kicker and Carvin Audio have a green LED power light, which simultaneously indicates whether it’s in protect mode or not. If it changes to red, meaning the amp entered the protection mode.
Amplifiers with digital displays show a warning or error message that pops up on the screen.
In some 1st gen amps, you may not find any indicator light. So, you need to check the amp’s power output. If the amp’s power output is significantly reduced, it likely means that the amp has put itself in protective mode.
Why Your Amp Goes in the Protection Mode – Causes
The most common reason an amp switches to protect mode is when there’s an internal failure with any of its components, which eventually results in the system crash. However, there can be external factors as well. Typical causes of these malfunctions include:
- Faulty Power Transistor
- Head Unit Wire Failure
- Overheating
- Inadequate Power Load (For New Amps)
- Mismatched in Circuits Impedance Loads
Any of the component’s failures mean the problem is severe (in most cases). One common symptom of such issues is your amp won’t start up.
If fortunately, you’re able to start your amp by pushing buttons or plugging in headphones, there’s a chance that the issue isn’t serious.
For internal defects that don’t allow the amp to restart, you need to take it to a service facility asap.
How to Get Amps Out of the Protection Mode – Fixes
If you’re experiencing problems with your amplifier, be sure to troubleshoot them. This will ensure you don’t have to spend money on repairs that aren’t necessary. Let’s take a deeper look into the mentioned problems and their fixes below.
1. Faulty Power Transistor
Whether you’ve got a broken or fried transistor, it’s caused mainly by blown fuses and makes the amp enter protection mode. There can be one or multiple reasons why a transistor fails. The most common ones are mechanical damages, power supply spikes, excessive heating, etc.
Solution: Replace or Repair the Transistor
The easy solution for a damaged transistor is to get a new one. However, if you got basic wiring (soldering, unsoldering) experience and the necessary toolkits, it’s possible to fix the transistor in your garage. Give the below steps a shot to proceed:
“In terms of regular transistor replacement, it’s more likely to get a higher distortion after repairing the transistor. It’s because amps’ stock transistors are a bit expensive and not quite available in the secondary market.”
- Identifying the malfunctioning transistor is the first step. Disconnect the amplifier.
“There are both output and input transistors. Usually, the amp protection mode issue is related to the output one.”
- In case of blown fuses or circuits, you’ll need an in-circuit transistor tester. You can also utilize a multimeter to diagnose the issue source. Keep 2000 ohms settings for the purpose.
- You’ll find 3 leads in the transistor on both sides. They can be applied both ways around each combination of these leads to create different circuits. Set the leads to every combination.
- To continue with the testing, you need to inspect the reading of the conduction level in both integrated components and the base-emitter controller. It shouldn’t be excessive for the base collector and emitter.
- Unsoldering the transistor is required. Make sure to do this one by one to avoid overheating the leads. Use pliers to move the lead’s head from the printed circuit board (PCB.) It’ll keep the leads harmless during liquifying the solders.
- Because of the repair, the existing mica washer and the thermal compound may get detached. So, it’s also required to use a new set of both for a flawless installation of the transistor. Choose the exact type of mica washer that it had before.
- Later, you need to adjust the bias current, which is also known as Quiescent. The process is simple. You just have to play a little with the preset potentiometer. It’s located beside the transistor’s driver. Adjust it according to the other channels. In that way, you can minimize the distortion.
2. Head Unit Wire Failure
It’s not that always the issue is related to stock parts. Sometimes, the problem could be sourced in externally connected units too.
Usually, faulty wiring of the head unit causes this sort of problem. There could be a high chance of overload in the following cases.
Hence, amps go into the protect mode when they detect such failure. This mode protects the amp from damage and allows it to start up again once the issue is resolved.
Note that there’s also a chance of incorrect remote power on setup. It happens only if you or the setup guy mistakenly linked the spec to the unit’s antenna.
Solution: Identify the Bad Wire and Replace
Since the problem typically occurs when there’s a wrong wire connection, you need to start from there.
“In the case of the error, the amp only shows protection mode if its system setting is set to the radio.”
Begin with inspecting the remote wire. It’s thinner than the power cable size. If there’s no issue, pick the power cable next.
These cables are supposed to have battery voltage; if you find it missing, there’s a chance of one or multiple inline fuses. And if you can’t find any of the issues, the cable is probably worn away. So, you need to get professional help to replace the wires.
On the contrary, if you find them both in good condition, you’ll find the issue in the ground cable. A faulty ground cable disables the power mode of the amp. As a result, it’s stuck in the protect mode.
“Sometimes replacing the existing RCA patch wires can also fix this problem if you can’t find a problem in the above parts.”
3. Overheating Amps
Amps also tend to be in protection mode when detecting the overheating issue. Overheating occurs when you use the amp for a long time or if it has defective wiring. Thus, the module tries to protect the device from unexpected damage.
Another possibility is that the amp has been subject to a lot of heat from improper wiring.
Regardless of the cause, overheating can have some pretty serious consequences. It can also permanently damage the amplifier, potentially rendering it inoperable.
Solution: Setup a Ventilation System
Sometimes, amp overheating can appear if the device quality is cheap. Follow the solutions given below only if you’re confident about the unit’s excellence.
When it comes to overheating, the primary solution is to add a ventilation system for the car amp. It can drive out the amp’s heating air. If this seems a bit costly to you, simply mounting a cooling fan can fix the issue.
Still, the problem isn’t fixed! If not, the issue is related to either the amp connection wire or installation. Check if the wire is worn out or loosened.
For damaged wire, you need to change it. And loosen the wire, simply patch it with electric tape. The air exhaust system will work fine again.
Lastly, in the case of the wrong installation, you need to eject the device and try reinstalling it. Also, check if it actually suits the specification of other connected units.
4. Inadequate Input Power (For New Amps)
Because of wrong voltage ratings, an amp also goes into the protect mode. Basically, this happens because the amount of power being drawn from the source outlet (engine batteries) and what the amp can handle are different.
In most cases, this occurs when a new amp is plugged into an outlet that wasn’t designed for it. The amp struggles to keep up with the power draw and switches to protect mode in order to protect itself.
Solution: Check Compatibility and Get a Replacement
First, disconnect the amp to check the compatibility issue of the car power outlet. Then use a multimeter to check the voltage reading of the outlet.
Most car amps’ voltage rating is 12V. Anything less or above forces the amp to turn the protection feature on.
Depending on the result, you can identify whether the problem is related to the car power source or the amp itself.
If the outlet shows less than 12V, there can be multiple factors behind it. It can be either the –
- The socket is worn out
- Car batteries lack power
And if the reading appears to be more than the standard, it overloads the amp. In some cases, changing the cable might work. But otherwise, you need to get a servicing.
Lastly, if the reading is okay, but still the amp isn’t working, you need to repair or change the amp.
5. Mismatched in Circuits Impedance Loads (Output Power)
Both amplifiers and subwoofers have separate circuits. However, these circuits have a correlational function, meaning they transfer power loads among themselves when the devices are turned on.
Things go wrong and cause these circuits to overwhelm when the subwoofer gets low impedance load than it should.
As a result, your amp circuit gets surplus watts, which is harmful. This can also happen when there’s too much stress on your amps, such as an overloaded power supply, a malfunctioning device, or excessive use. If left unchecked, these overloads can damage your amplifier.
Solution: Fix the Impedance Loads
If you experience problems with your amp that seem to be related to overloads, it’s essential to try and resolve the problem before it enters the protect mode.
Remember, when your amp detects that the connected devices are under too much stress, it attempts to revert to their default settings. This usually means turning off all of the power and resetting all of the settings to their original defaults. This will solve the issue in most cases, and your device will resume normal operation.
And if it still shows the problem, you need to balance the impedance loads of connected woofers. For a single subwoofer, it’s easy. You just need to match the parameter of both devices.
For multiple woofers, first, calculate the impedance of all the woofers separately. You can use Ohm’s law. In brief, you need to divide your device voltage by the current.
Inspect the load ratings after matching the impedance of your amplifier and woofers. You can find whether your amp has a surplus or shortage of power. Based on the ratings, adjust the power load of the amp.
“This process is only advised to follow if you’ve prior experience in circuit management. Otherwise, get help from an expert.”
How to Reset the Protection Mode of an Amp after Fixing?
Even though you’ve fixed any of the abovementioned issues, your amp will still stick in the protection mode. It’s normal. You need to reset the mode in such a situation.
However, resetting methods vary depending on the amp brand. Follow the below instruction for general purposes.
“The following reset method cleans the amp’s internal memory, except the amp’s system settings. So, do it on your own stake.”
- Keep the amp’s power out. Thus, you need to switch off your car engine.
- Also, unplug all amp connections, such as the power and grounding lines, RCA cables, speaker, remote lines, etc.
- Open the engine hood to find the car batteries.
- Next, find out the amp’s positive (+) post terminal. Usually, the wire color is red.
- Upon finding the plug, you’ve to eject it from the outlet. To do so, use a wrench to remove the bolt first. Then remove the plug and wait 30 seconds.
- Then plug it in again. While plugging in the line, it’ll spark due to getting power flow. Don’t worry about this.
In most vehicle amplifiers, it’s a common resetting method of the protect mode. However, I’ve seen some amps also that require you to disconnect the lines for a few hours to perform a reset, like Skar amps.
For any reason, if the reset isn’t working, even though there are no internal or external flaws, you should consult with the manufacturer for better advice.
Why an Amp Goes into the Protect Mode When Cold?
Though it’s unusual, you might witness your amp switches to protect mode in the cold season. In general, this sort of problem keeps the amp in the mode for a specific time. But when the car heats up, it changes the mode.
To resolve this problem, check the power and grounding lines first. Upon not finding the source of the issue, you need to open the amp circuit while it’s connected to the car power source.
Now start the engine to heat up the car and amp. You need a penetrant like the CRC Freeze-off spray.
It would help you identify the faulty part causing the problem. Apply it on the board and cable lines.
Any thermal-sensitive component will show its signs against the spray. Whether it’s the cable, fuse, or other parts, you must replace it to fix the issue.
Can a Bad Grounding Cause Amps Stay in the Protection Mode?
Grounding helps your car amp system keep electrical flows stable. But when an amp is grounded incorrectly, it can cause it to go into protection mode. If this occurs, the amp’s internal protection circuitry detects problems and begins to avoid the interflow of power.
The symptom of bad grounding is unusual noise from the speakers even though it’s in the protect mode. You may also witness sparks in the connected cables.
In most cases, this means that the amp won’t work until the grounding is corrected. One common source of ground problems is connecting a DC (direct current) outlet to a metal frame or cord wrap. This connection can create a strong electromagnetic field that causes interference with the amp’s protection circuitry.
Other sources of ground problems include improper installation of the amp, wiring that has been damaged, or an unstable connection at the outlet.
Improper grounding can cause a fire in the cable lines or permanently damage the amp and connected devices like subwoofers and speakers.
If you’re experiencing problems with your amplifier going into protection mode due to a grounding problem, it’s best to consult a qualified technician. They will be able to identify the root cause of the problem and fix it.
Frequently Asked Questions
1. Why an amp goes into the protection mode when bass hits?
Amplifiers’ bass represents low frequency. It’s the opposite of the volume master, which refers to high frequency. The amp needs a lot of power that it needs for volume to continue an uninterrupted bass production.
In general, the system can handle this additional power. Still, when there’s a grounding or overloading problem, it switches to the protection mode when the bass hits.
2. Why an amp goes into protection mode when turning the volume up?
If your amp enters the protect mode when turning up the amp volume, it’s a sign of a lack of power supply issue. This can also happen if you’ve old and worn-out power cables.
3. How to reset a car amp?
Usually, there is a button under a labeled hole in the amps. This button is used to reset the amp into factory settings. You need to remove the label. Use a pin to press the button and hold it for a while. It’ll take a reset.
4. Why does my amp’s red light stay on?
If your amp’s red light stays on, the system has switched to protection mode. Try resetting the mode and amp chronologically. If it stays in the same condition afterward, it’s most likely having an internal malfunction, which requires immediate troubleshooting.
Conclusion
That’s all about how to get an amp out of protection mode. In conclusion, if you notice that your amp is stuck in the protect mode, it’s crucial to figure out what caused it.
There can be overloading, overheating, voltage mismatch, faulty wiring, or grounding issues. In any matter, urgent troubleshooting is mandatory. Otherwise, the source problem may permanently damage your car amplifier.